Your homes can be your refuge from the world. You want it to be comfortable yet stylish no matter what your home décor budget. If you watch home make-over shows or talk to an interior designer they might tell you that one great piece of art can be the focal point for the entire room.
The problem with great art is that it is usually not inexpensive. If this has stopped you from hanging anything in your home you may be surprised that beautiful paintings don’t have to cost you an arm and a leg. There are great places to look for inexpensive art and even ways to make your own.
Friends and Family
Do you have an artist in your family? Do you have any friends who paint? Ask them if they’d paint something for your home. They may do it for little money or even for free. My dad is an artist and almost all of the paintings in my home are his work. You could offer to buy the canvas and some supplies in trade.
Friends and family may have art they don’t have up and would be happy to let you use it. You might be surprised what you can find in your parent’s attic. Have a look around in storage areas for forgotten items. If you find something they most likely have forgotten they even own it.
Thrift Stores
Once in a while I like to go around to the thrift stores in my area and have a look at what inexpensive art they have. I often find unique items that can be restored or used as-is for home décor. I have a painting in my living room I found at a thrift store. It looks like an unfinished water scene and I fell in love with it when I found it. It cost me one dollar!
Neighborhood Sales
Don’t forget to check out the rummage and garage sales in your area for inexpensive art. People’s taste in art varies tremendously. People may be trying to get rid of a painting they don’t like but that doesn’t mean you won’t love it. Even if you don’t find a great work of art you may find a beautiful frame you can use later when you do find something you like. Don’t stress out thinking, “What do I like?” You’ll know when you see it. When your eye falls upon something you will either want to grab it and take it home or you barely give it a second glance.
Poster Prints
There are companies that make poster prints of famous paintings. These posters cost the same as any other poster you may have hung in your room as a teenager. I have a great print of a Picasso called “Old Man With Guitar” hanging above my couch. You can go to any retailer that carries frames and find a poster-sized frame. It’s not the same thing as a painting but if you love the picture you’ll feel great every time you look at it.
Along the same lines you can find art on the Internet and print it out. How good they will look will greatly depend on your printer and the quality of the picture you find. I have two prints of my dad’s paintings framed in 8 X 10 frames hanging in my home. You can see the brush strokes and they both look great! Remember when you are searching online to be aware of copyright issues. In most cases if you are printing something out just to hang in your home you are fine. Never reproduce and sell someone else’s artwork without their permission.
Make Your Own
This is something you can do even if you think you don’t have an artistic bone in your body. You may not be able to create a breathtaking landscape but you will be able to produce something pleasing to hang in your home.
Any craft store carries canvas and paint supplies. Decide what colors you want and go get your supplies. You can use brushes or your own fingers if you’d like. When choosing colors choose five or six that you find appealing and that go well together. Look around on the Internet or in magazines for inspiration and have a go at it. Perhaps the hardest part of making your own art is knowing when to stop. If it looks good stop! Over doing it can ruin a great look. Frame it, hang it and enjoy.
You can also leave the artwork up to your young ones. You could make it a fun family project. Spread out an old sheet to protect the floors and have everyone paint with their hands or even their feet. If that doesn’t appeal to you there are other alternatives. Cut potatoes in half and carve a design in them and allow your child to stamp the paint and designs onto the canvas. You can dip strings into the paint and hit the canvas with the wet string. You may end up with a fantastic piece of art as well as a memory to hang on your wall.
You may already own great art that is just waiting to be framed. My daughter loves to finger paint and I have a stack of paintings that is at least six inches thick. I am often surprised to find out how beautiful some of them turned out. You can pick out some of your child’s work and frame them singly or as a collage.
Wednesday, March 16, 2011
Inexpensive Art for Your Home
Christmas Light Photography Tips and Advice
We're out taking photographs of Christmas lights. There are so many beautiful displays, and we want to capture them on film. So as we prepare to take our pictures of Christmas lights, we back away so that we can capture the entire magnificent scene within our frame.
Correct. But also incorrect, if that's all we do. And this leads to our first Christmas photography tip for illustrating Christmas light displays.
(1) The best Christmas lights photography captures not only panoramic scenes, but also close-ups of the highlights within the panorama. We want both. Let's say that on the sprawling front lawn of a suburban home, we see Santa on his sleigh in one location, and a Salvation Army bell-ringer in a second spot, and a nativity scene someplace else. In addition to our distant Christmas photograph, we can also zero in on each of those three highlights.
(2) Opt for a high shutter speed. We want to illustrate the lights, not the light that they emit. A wide angle lens is for the panorama, and a macro lens is for the close-ups.
(3) Those Christmas light displays are so brilliant in the deep, dark, Silent Night. Maybe so, but our Christmas photography will be lousy at that point. Our photos will show the lights, but not the property in the background. Or, we'll see the property but we won't clearly see the lights, so to speak. Our best bets are at dusk or at dawn, and overcast usually is better than clear sky.
(4) If we're really dedicated and sticklers for perfection, we'll shoot our Christmas photography both at dusk and at dawn. Great photography of any sort is trial and error. Furthermore, if we show up maybe a half-hour before the optimal time, then we can plan our logistics and our camera angles, so that we're ready when the time is right. Extra time = excellence in our Christmas photography.
(5) Let's see here. We have the lights. We have the various props that go with the lights, such as the nativity scenes or Santa on his sleigh. We have the property in the background. Aren't we forgetting something? Oh yes, the sky. The sky! Look at examples of Christmas lights photography that impress you (or even thrill you) the most, and odds are that the sky will play a prominent role. Seek an angle at dusk that shows an afterglow in the evening sky. To include more sky, shoot from a low angle, upward toward the Christmas lighting display and toward the sky.
(6) People. Where are the people? Just because your subject is Christmas lights photography, that doesn't mean the scene must be devoid of people. Have some children pose in the scene, or better yet, just tell them to go ahead and frolic. This can add a unique element to your Christmas lights photography.
SOURCES
http://www.intofotos.com/photography/2007/11/10/how-to-photograph-christmas-lights/
http://strobist.blogspot.com/2006/12/how-to-photograph-christmas-lights.html
http://www.slrphotographyguide.com/tips/christmas-lights.shtml
Daily round up
sanyodigitalcamerasblog.blogspot.com/2011/03/digital-photography-home-business
digitalwildlifecamerasblog.blogspot.com/2011/03/art-and-religion
digitalvideocamerasblog.blogspot.com/2011/03/independent-film-scene-in-eugene-oregon
discountdigitalcamerasblog.blogspot.com/2011/03/camera-buffs-why-are-you-still-using
nikondigitalcamerasblog.blogspot.com/2011/03/using-depth-of-field-for-photography
digitalcamerasforkidsblog1.blogspot.com/2011/03/art-and-science-of-teaching
digitalcamerasratingsblog.blogspot.com/2011/03/diy-wedding-photography-shot-list-for
comparedigitalcamerasblog.blogspot.com/2011/03/montana-cine-international-film
compactdigitalcamerablog.blogspot.com/2011/03/baby-photos-and-art-of-photography
digitalcamerapinkblog.blogspot.com/2011/03/five-great-art-deco-buildings-in-los
disneydigitalcamerablog.blogspot.com/2011/03/brindisi-students-art-and-music
argusdigitalcamerablog.blogspot.com/2011/03/sound-in-film-and-cinema
digitalcameracomparisonsblog.blogspot.com/2011/03/annual-art-contests-for-kids
sonydigitalvideocamerablog.blogspot.com/2011/03/brief-evolution-of-art-and-influence-of
i631digitalcamerablog.blogspot.com/2011/03/brutal-reality-drowned-in-deepa-mehta
sanyodigitalcamerablog.blogspot.com/2011/03/suspiria-film-between-dreamlike-imagery
digitalcameralensblog.blogspot.com/2011/03/independent-film-scene-in-eugene-oregon
kidsdigitalcamerablog.blogspot.com/2011/03/enjoy-art-museum-docent-tour-and-lunch
olympusdigitalcamerablog.blogspot.com/2011/03/camera-buffs-why-are-you-still-using
canondigitalcamerablog.blogspot.com/2011/03/making-movies-for-48-hour-film-festival
kodakdigitalslrcamerablog.blogspot.com/2011/03/mirrormask-illustrated-film-script
hpdigitalcamerablog.blogspot.com/2011/03/yucandu-studio-just-west-of-st-louis-mo
kodakdigitalcamerablog.blogspot.com/2011/03/tips-for-your-commercial-photography
buydigitalcamerablog.blogspot.com/2011/03/movies-you-must-see-before-you-die-must
digitalcamerabatterychargerblog.blogspot.com/2011/03/six-tips-to-help-you-clean-and-organize
digitalslrcamerablog.blogspot.com/2011/03/brief-history-of-sundance-film-festival
panasonicdigitalcamerablog.blogspot.com/2011/03/how-europeans-incorporate-eastern-art
digitalcameracasesblog.blogspot.com/2011/03/montana-cine-international-film
slrdigitalcamerablog.blogspot.com/2011/03/mirrormask-illustrated-film-script
fujifilmdigitalcamerablog.blogspot.com/2011/03/need-to-know-basis-history-of-sundance
vivitarminidigitalcamerablog.blogspot.com/2011/03/diy-wedding-photography-shot-list-for
digitalcameraaccessoryblog.blogspot.com/2011/03/mods-rockers-film-festival-starts
sonycybershotdigitalcamerablog.blogspot.com/2011/03/mirrormask-illustrated-film-script
digitalcameramemoryblog.blogspot.com/2011/03/diy-wedding-photography-shot-list-for
kidtoughdigitalcamerablog.blogspot.com/2011/03/laguna-art-festivals
freedigitalcamerablog1.blogspot.com/2011/03/where-to-find-great-black-and-white
cameradigitalhpblog.blogspot.com/2011/03/how-to-do-pinhole-art
casiodigitalcamerasblog.blogspot.com/2011/03/xala-review-of-film
buydigitalcamerasblog.blogspot.com/2011/03/10-great-tips-to-make-any-diy-winter
canonpowershotdigitalcamerablog.blogspot.com/2011/03/tips-for-breaking-into-sports
wholesaledigitalcamerablog.blogspot.com/2011/03/2006-comcast-outdoor-film-festival
sonydigitalcamerasblog.blogspot.com/2011/03/asian-stereotypes-in-film-history
smalldigitalcamerablog.blogspot.com/2011/03/enjoy-art-museum-docent-tour-and-lunch
kodakc743digitalcamerablog.blogspot.com/2011/03/incentive-for-hope-in-florida-film-tv
cheapdigitalcamerasblog.blogspot.com/2011/03/mirrormask-illustrated-film-script
thindigitalcamerablog.blogspot.com/2011/03/making-movies-for-48-hour-film-festival
digitalslrcamerasblog.blogspot.com/2011/03/five-great-art-deco-buildings-in-los
trishskidsandparentsblog.uwcblog.com/2011/03/16/budget-winter-wedding-photography-guide/"
digitalcamerapictureblog.blogspot.com/2011/03/top-holiday-presents-for-silent-film
comparedigitalcamerablog.blogspot.com/2011/03/photographer-interview-break-into
digitalstillcamerablog.blogspot.com/2011/03/asian-stereotypes-in-film-history
digitalcamerapriceblog.blogspot.com/2011/03/fantastic-film-for-any-type-of-movie
digitalcamerabuyerblog.blogspot.com/2011/03/creation-of-art-is-subjective
digitalcamerabinocularsblog.blogspot.com/2011/03/creation-of-art-is-subjective
digitalcameraworkblog.blogspot.com/2011/03/art-and-science-of-teaching
konicadigitalcamerablog.blogspot.com/2011/03/inexpensive-art-for-your-home
leicadigitalcamerablog.blogspot.com/2011/03/shooting-for-stock-photography
hitachihdc1061e10mpdigitalcamerablog.blogspot.com/2011/03/using-depth-of-field-for-photography
jansweightlossblog.blogspot.com/2011/03/10-great-tips-to-make-any-diy-winter

credit
Some educators view teaching as primarily an art. Others take an opposite point of view and consider teaching to be strictly a science. Many educators believe that effective teaching is a combination of both art and a science. A teacher gains knowledge both, of teaching methods and subject matter throughout his or her career. The art of teaching lies within the application of knowledge gained from research, taking place in the context of the unique, situational nature of the classroom. One cannot truly become an effective teacher without integrating both the art and the science of teaching.
Teaching as Art: Understanding Through Definition
Webster's II New Riverside Dictionary gives several definitions, which can be used to support the idea of teaching as an art. The definitions include but are not limited to: (1) "the activity of using imagination and skill to create beautiful things (Webber,1984, p.41)", (2) "a field or category of artistic activity (1984, p.41)", (3) "a trade or craft and the methods employed in it (1984, p.41)".
Teaching As an Artistic Process Achieving an End Product
Teaching involves imagination and skill in creating student learning. This refers to the activities in which teachers engage each day, utilizing both imagination and skill, and one might add intuition. Teachers engage in such activities to bring about the product which is student learning. It is interesting to note that the product in this case is also by definition, a process.
The classroom environment, for example, can be broken down into 2 components: (1) physical design, and (2) social-emotional climate. The classroom learning environment can be considered a work of art in and of itself. Without a proper environment, both physical and emotional, students will not be able to learn effectively. The physical environment can be relatively easy to maintain, but the emotional climate for learning requires the artful application of imagination, skill, and intuition on the part of the teacher.
Some aspects of the emotional climate of the classroom can be pre-planned, but most of the work involved in the maintenance of a proper social-emotional climate for learning, is done in the moment. In Maintaining a positive learning climate, the teacher must take into account the endless supply of variables that may appear without warning, in the milieu. Keeping the classroom and the students organized and on task, while teaching the required skills and concepts, and the whole time fostering an atmosphere of respect, caring, and responsibility, describes the artistic process by which teachers conduct business. The product of this artistic process is a class of students who respect and care for one another, in the process of effectively learning subject matter.
Teaching is a Category of Artistic Activity
Teaching is indeed a category of artistic activity. In an interview on pedagogy, teacher Camille Paglia describes her teaching style as "improv", and relates it directly to performance art (Rodden, 1996). She refuses to accept someone reading a prewritten lecture as teaching (Rodden, 1996). Madeline Hunter describes teaching as a dynamic activity, and finds it important to see each teaching situation as unique due to the interplay of many variables (Magestro, 1994). The art of teaching involves not only knowing what to do and how to do it, but also knowing when to do it, and in what situations not to do it (Magestro, 1994). It is this kind of thinking process that takes teaching from a scientific base to an art form (Magestro, 1994).
Teaching as a Trade and a Craft
It is obvious to most that teaching is both a trade and a craft, and therefore by definition, the method by which teachers practice their trade, is an artistic process. Those who argue teaching to be purely a science cannot properly argue against this definition. In defining art in such a manner, one can easily see that it is the application of the science that constitutes the art. Teachers apply a body of knowledge regarding what is known about teaching and education, as well as subject matter. The art of teaching consists of decision making in the moment, building a repertoire of techniques and skills, and knowing when to draw upon which techniques, that make up the art of teaching. Some consider this an extreme form of multi-tasking, a challenge even to ex-soldiers, as described by Brougham (Inspiring Words, 2003).
Teaching as Science: Using definitions to Gain Perspective
Webster's II New Riverside Dictionary defines "science" as (1) "the study and theoretical explanation of natural phenomena (Webber, 1984, p.620)", (2) "a systematic activity requiring study and method (1984, p.620)", and (3) "knowledge, especially that acquired through experience (1984, p.620)".
Teaching as the Study and Explanation of Learning
Broadly speaking, education can be defined as the study and theoretical explanation of teaching and learning. Educational research, along with research from several other fields, provides the basis for our understanding of educational methods (Ivie, Roebuck, and Short, 2001). Educational research is a component of education, not a separate field, as may be commonly assumed. Educational research is an important part of what teachers do in the classroom on a daily basis. Teaching as a profession, as described by Madeline Hunter, is based in the "science of learning" (Ivie et al., 2001). Teachers utilize the knowledge gained from research findings in the classroom each day. Educators sometimes even take part in educational research, conducting action research within their own classrooms.
Teaching as a Systematic Process
Teaching is systematic, and it requires much study before entering the profession, and throughout one's career. The results of experiments done by B.F. Skinner in the 1960's were found to be applicable in the classroom setting (Ivie et al., 2001). Many principles of behaviorism are utilized in classrooms today, especially with students with special needs. Students with certain presentations often respond well to behaviorally based programs, in which they are rewarded for positive or desired behaviors in an attempt to extinguish negative or unwanted behaviors. Behavioral techniques often provide some benefit to the general student population as well.
There are some that view the use of technology in education, as an aid in systematizing teaching (Ivie et al., 2001). Author Seymour Papert, who writes on children and technology, states that the use of technology and computerized learning will someday allow us to so modify a child's learning environment to point of not needing schools (Ivie et al.)! Such an idea may seem a little strange to the educators of today. However, Papert may be on to something. Computerized technology may be of great help in systematizing aspects the educational system, or at least in terms of the teaching and learning of isolated skills in the classroom.
Education as a Body of Knowledge
Madeline Hunter has described teaching as an applied science based on research on learning and behavior (Ivie et al., 2001). The body of knowledge that makes up what we know about education, broadly speaking, defines education as a science by definition. Hunter has noted that education as a field takes into account knowledge based on research from several other fields including: psychology, neurology, and sociology (Ivie et al.),
On an individual level, the teacher has also developed his or her own specific fund of knowledge, integrating information from other sources as well. A teacher builds a repertoire of teaching and subject matter knowledge over the course of his or her career. The acquisition of knowledge begins in college, or maybe even before. It does not, however, end with formal higher education. Not only is professional development mandated by state and federal agencies, teachers are also involved in continual reflection, and are by design, always trying to improve their teaching methods. Improvement is made possible only through the continual accumulation of knowledge. This accumulation of information and improvement of teaching practices based on information gained from speaks to the science of teaching.
Some people view teaching as an art, others consider teaching to be a science. It is important to note however, that those who truly understand the process of teaching can appreciate the interrelated and synergistic combination known as the art and science of teaching. The art of teaching i.e., the creative processes, the skills, and the teaching craft, is found in the application of the science of education: the systematic processes, the body of knowledge gained from several disciplines. A teacher needs to utilize both the art and the science of teaching to create effective student learning
References
Brougham, H. (2003). Inspiring words for educators. Curriculum Review. 42(9), 8.
Ivie, S.D., Roebuck, F., & Short, R. (2001). Experienced teachers insist that effective teaching is primarily a science. Education, 121(3) 359-35.
Magestro, P. (1994). Tribute to Madeline Hunter. Educational Leadership, 51(7) 83.
Rodden, John. (1996). A TPQ interview ‘improv' is my pedagogical style: Camille Paglia on teaching as performance art. Text and Performance Quarterly, 16(2), 161-171.
Webber, H. (Ed.). (1984). Webster's II new Riverside dictionary (Berkley ed.). New York: Houghton Mifflin.
Sunday, February 27, 2011
Amazing Secrets of Underwater Photography

Photo Credit: celtics baby clothes
Do you like underwater photography? Do you want to know how it is done and what are the different things you should look out for when taking underwater pictures? Then you have come to the right place to learn what really underwater photography is. We all know that underwater photography can be a great fun and enjoyment activity and it can be more enjoyable experience for you if you really know all the nitty-gritty about underwater photography.
If you want to take beautiful underwater pictures then most importantly you should have a powerful digital camera which can work underwater without any hassles. Because it is not like that you go underwater and immediately start taking pictures. Rather you have to take care of many things when taking pictures in the deep water. If you do not take enough care then your pictures can become blurred and quality can be compromised. You should always look out for the direction of the sunlight underwater as sunlight travels differently in the deep water which affects the picture quality. You have to adjust your camera angle properly with the direction of the sunlight when you are underwater.
Then there is the impurity in the ocean water like mud and dirt which can really affect the picture quality underwater. This dirt can make the water so impure that you can not see properly in the deep water. But this happens most of the times only in the lakes and rivers. But many of the oceans are so clear and pure that you can see longer distance without any problems and your pictures most of the times comes as a quality product.
Many people who try underwater photography; takes their own friend's and families pictures and this can be more entertaining and really memorable experience for the family members to cheer for long time. But one of the most important factor every underwater photographer should remember is that the underwater currents and their effects. It is the most unpredictable factor which really affects our picture quality when you are underwater. When you are underwater it is extremely difficult for everybody to stand still in the same pose. And with the dynamic nature of underwater currents it becomes more difficult to give the still pose for the photo. So you should always keep in mind the direction of the underwater currents while taking pictures.
With the advancement of different types of digital cameras it will become easier in the future for us to take underwater pictures and really enjoy the experience of underwater photography.
Photography Tips and Tricks
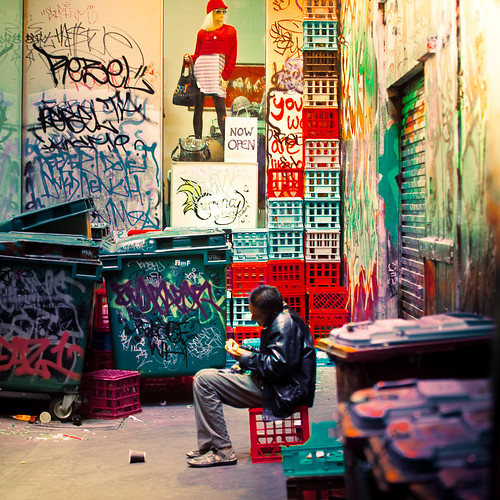
photo source
Photography isn't just about making memories, it's about art. Be artistic. Here are a few tips and tricks to help you make those photos, picture perfect.
To make those dull photos turn into works of art, consider these questions:
Decide if you want the full subject, half, or even a close up. How much background do you want, or even foreground? Exactly how close do you want that close up? What details do you want to focus on? Do you want a vertical, horizontal, or tilted photograph? What angle do you want? What's the best lighting? What background do you want to use?
1. Placing the subject of interest. Choose how much of the subject you want photographed. (Example: you want full body, half body, or face shot.) If your subject fills the frame then it's okay to center it. If you are trying to get more of the background, try placing your subject to the right or left in the viewfinder. With a horizontal (laying down), try to place them at the top for more foreground, or at the bottom for more background. And you could even tilt the camera for a more funky picture. It all depends on what part of the scenery you want visible in the picture. Maybe you want that tree to your left and your subject to the right. Or the patch of flowers in front and the mountains in back. (I find it best to take my time and take shots of each possible way and several different poses. This way I know I'll find the best photograph with the most potential.)
2. Don't center. The circle, plus sign, or brackets in the middle of your viewfinder is for focusing and isn't necessarily for centering the subject. Placing your subject in t he circle could leave you with a lot of empty and useless space on your photograph. Too much background and not enough subject. If your subject fills the frame then it is okay to center them. (Sometimes you just have to ignore the focus points and concentrate on your subjects placement in the frame instead.)
3. Camera angles. Walk around the subject, shoot from all angles and sides. This will help you to get the best lighting, background, and different aspects of the subject. You will want to find the best angle for all three. Pick a background that will not distract your viewers from the subject of interest. (I choose my backgrounds to where there's not much clutter. Sometimes I will use a plain sheet or blanket and place it behind the subject, but making sure it does not clash or blend.)
4. Reflectors. In some situations you just can't get enough light or you perhaps you just want more. To use a light reflector, place it in a position where it reflects light onto the subject without it getting in the frame. Use this if your shot is coming out too dark or there are too many shadows. On night shots that you need more than your flash can put out, place a lamp (or several) near your subject, but out of sight, and use the light reflectors to bounce from the lamps to where needed. (Some homemade light reflectors can be real cheap to make. You could use white cardboard, or if you can't find this, then simply take any piece and paint it white. For more light, place tin foil over your piece of cardboard, smooth it out, and reflect where needed.)
5. Shading. Using the same piece of cardboard as mentioned above, you can use this to block the light as well. You could make this easier by painting one side white and the other black. Or just place the piece in front of the lamp or sun to dismiss light from your subject. On most cameras you can use a sunshade for the lens, some cameras come with this, some you buy separate. This won't keep light from your subject, but it will block the light from causing a flare effect on the outcome of your photograph. The sunshade just clicks into place around your lens, and keeps the lens safe from any glaring.
6. Outside daylight. Direct sunlight is when you place the sun behind the camera, but in front of the subject. Using direct sunlight can cause shadows on the subjects face and possibly their eyes squinting. Back light is when the sun is behind the subject and in front of the camera. This will lighten the photo and cause much softer features on the subject.
7. Preventing red eye. Red eye is caused when the flash is too close to the lens. Ways to prevent this are: Attach a larger flash to your camera, t his way the flash is further from the lens. Or if buying a camera, look for one with the flash located far from the lens. Try getting closer to your subject when needing the flash. (Before I bought my camera with built in red eye correction, I had to use a photo editing program to correct these problems. I was even scanning my pictures and still having to edit when I was using my film camera that was hopeless against red eye.)
Saturday, February 26, 2011
10 Great Tips to Make Any DIY Winter Wedding Photography Successful!

credit,image source
This winter many couples are choosing do it yourself wedding photography in an attempt to save money. Wedding photography is tricky because if not done right there will be no good documentation of the special day. My dad does wedding photography as an amateur hobby; wedding photography is not skill less, but can be done easily with practice by almost any amateur photographer. This article will take a look at 10 tips to make DIY winter wedding photography successful; however keep in mind DIY wedding photography takes copious amounts of editing after the ceremony.
1. Camera
Taking wedding photographs should be done with the right camera, not a regular point and shoot camera. I recommend using the Canon EOS Digital Rebel XTi, it takes high quality pictures and is relatively easy to use. This camera can be found at www.buy.com for $569.95, but you should check to see if anyone in the wedding party can provide this camera or a similar model to save on money.
2. Flash
Relying on the built in pop up flash in any camera is a recipe for failure; you will want to use an external flash for low lighting pictures, such as a church or an evening reception. Winter conditions outside will not require a flash due to the reflection of the snow, but it can be used if done right; however inside you will want a powerful flash. I cannot give a recommendation because certain flashes work for different cameras; therefore the flash will be determined by your digital camera choice. www.ritzcamera.com has a good variety of flashes, lenses, and cameras.
3. Lenses
Unfortunately DIY picture taking is not cheap and requires the proper zoom lenses for great photos from anywhere in the room. Buying any secondary lenses is not necessary, but they will make the pictures better. www.ritzcamera.com has a good selection of lenses; it is where I purchased mine.
4. Go Digital
The hardest part of DIY wedding photography is getting professional looking shots. Going digital allows for touchups on the pictures after they are taken so that they come out perfect. Going digital also saves on prints since all the photos can be saved on a flash drive or a CD.
5. Choose an artistic guest for the job
Capturing the right moment is what photography is all about; having a guest that is willing to take pictures who has an artistic eye is the best way to get quality shots. Do not expect a gift from the photographer as it takes hours of work to take and edit great shots.
6. Be aware of lighting conditions
Winter is the hardest time of the year to take photographs outside due to the reflective nature of snow and the brightness of the sun. Be creative on the angles of your photographs; many high end cameras also show the contrast ratio on the photos taken, look at the contrast to make sure the photos are coming out correctly.
7. Be aware of where the sun is
Do not shoot towards the sun or objects that are in the sun, it can cause shadows and some funky looking pictures. Just be aware of the sun and preview one or two pictures before taking more.
8. Capture photos with the theme
If your theme is a winter wonderland then capture that theme in the photos! Try to include shots of the bridal party and newlyweds in the natural theme of the wedding; also try to include guests in the same theme. Be creative with the shots, you may have to shoot at different angles to get the desired results.
9. Use the flash
Even in snowy conditions you should experiment with the flash for better pictures, the bright the background the more the object you are photographing will stand out. This may not always be the case; therefore you should check the pictures being taken to make sure they are coming out professionally.
10. Edit, Edit, Edit
No DIY photography is complete up completion of the ceremony! There are countless hours of editing that must be taken on to get professional looking results. If you do not have the proper computer skills try to find a guest that would be willing to help edit in exchange for their wedding present.
This site has some extra DIY tips that can help during a winter wedding; I did not cover many these tips, so it may be a good read: http://www.squidoo.com/weddingphotographyguide
Sources:
www.ritzcamera.com
http://www.squidoo.com/weddingphotographyguide, DIY Winter Wedding Photography
Upgrade Your Digital Photography Studio on a Budget

credit
Digital photography is progressing almost as fast as the computer industry. Mega-pixels are multiplying faster than you can count them. As with all advances in technology, a higher price tag is attached. So, how do you upgrade your digital photography studio with out breaking your budget?
Let's go over a few ways to do just that.
Upgrade your Digital Photography Studio - Don't Buy New
The more mega pixels the better, I know. But, if you are using a 5.0 mega pixel camera now, wouldn't a 6.0 one be an upgrade? There is no need to spend the extra $3000 to get the newest 10 mega pixel digital camera.
There are plenty of used camera stores to find newer equipment that will fit your budget as well. KEH offers a huge selection of both new and used digital camera equipment, all of which has been cleaned and tested.
Let's not forget about eBay either. The deals there on new equipment are sometimes better then buying older used equipment. You never know when some college kid is going to sell off his $3000 digital camera just so he can make rent.
Upgrade your Digital Photography Studio - Compensatory Upgrades
Find way to stream line your business. Odds are, you don't have a lot of people working at your digital photography studio. So, you probably wont be buying equipment that saves you money by eliminating workers. Still, there is always new software coming out to help you stream line your business.
Such software may be expensive at first, but will be worth the price. Even if the software does nothing more than free up two hours in your work day, that is two more hours to make money. That is two more hours to see customers. Those customers could then turn into lifetime customers who bring your repeat business and great word of mouth advertising. All because you freed up two hours in your work day.
Upgrade your Digital Photography Studio - Upgrade Only What You Need
Upgrading your digital photography studio doesn't mean you have to spend a fortune on new gear, lights, printers, computers, and what have you. Take some time to really identify what it is in your digital photography studio that needs to be upgraded.
Lets say you bought an expensive sub dye printer years ago to start printing photographs in house. 60,000 prints later, it's just not what it used to be. This doesn't mean you have fork over a huge amount of money to buy a new one. You could out source your printing for a while or you could even look into getting the printer refurbished by the manufacturer.
Upgrade your Digital Photography Studio - Upgrade Your Staff
Not every digital photography studio upgrade is a piece of expensive new gear. Invest some of your budget by training your staff. If you have other photographers working for you, try spending some money on a training workshop. The more your employees know about their job, the better they are at it. These workshops will help increase your staffs skills, but it will also help them get a better picture of what you want. Being on the same wavelength with your employees will also help them operate more efficiently
If you have complicated software programs, consider having a sales rep come out and teach your staff about the software. This goes back the same point, the more your employees know, the better they operate. Often, sales reps will be more than happy to come out and teach refresher courses or how to use new programs free of charge. After all, the happier you are with their product, the more you will buy from them in the future.
These are just a few ways to upgrade your digital photography studio with out breaking your budget. There are always ways to pinch pennies if you think about. The biggest obstacle to get over is the, must have the new stuff, mentality. You almost never need the new stuff, it is almost certainly nothing more than a want. Think before you buy and you are sure to save money in the now and make more in the future.